The Peral Submarine. (1888)

Introduction.
The idea for this model started on a Mediterranean cruise we were on in November 2023.
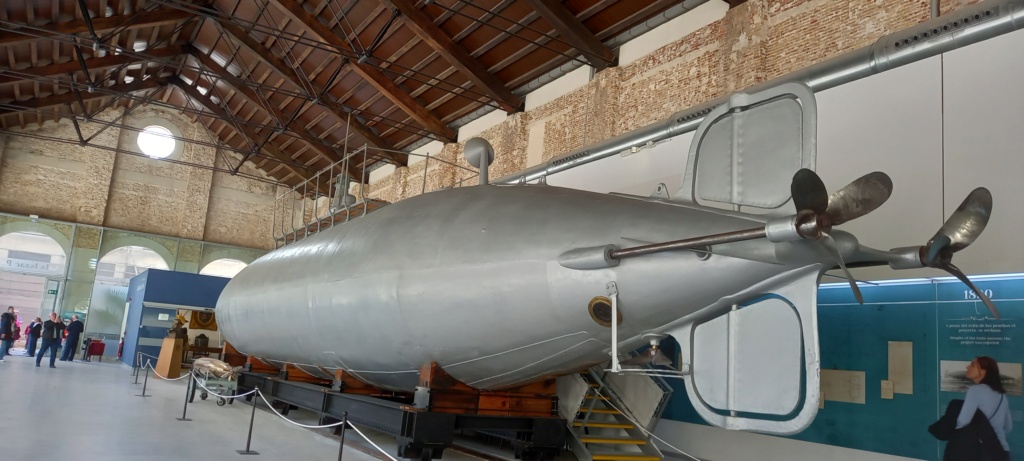
Cartagena (the name is derived from Carthage - yes, its origins go back that far) is a handsome Spanish city which also happens to be a Naval base with an excellent Naval museum and this well preserved original submarine. The city and the Spanish people are still clearly and rightly proud of this sub. These photos were taken during my visit.
The Peral was perhaps the first successful fully electric battery-powered submarine. She was built by the Spanish engineer and Naval Officer Isaac Peral for the Spanish Navy. She had one torpedo tube (and two torpedoes) and an air regeneration system. Her hull shape, propeller, periscope, torpedo launcher and cruciform external controls cleverly anticipated later designs. Her underwater speed was 3 knots .
With fully charged batteries, she was the fastest submarine then built, with underwater performance that matched those of First World War subs (except for range). In June 1890, Peral's submarine launched a torpedo while submerged. It was also the first submarine to incorporate a fully reliable underwater navigation system.
However, despite the support of the Spanish Queen Regent Maria Cristina, conservatives in the Spanish naval establishment terminated the project after two years of successful tests.
I liked the look of the Peral submarine for the purposes of making a model:
- clean lines
- not much in the way of deck fittings to get knocked off.
- a cylindrical centre section which would be simple to reproduce and would have a useful internal volume.
- twin props were interesting and could give flexibility in use.
- hull sections with a lot of symmetry about them - easier to make using a 3d approach.
For the model itself, I had the following design principles:
- needs to fit on the back seat of a car. No longer than my magic figure of 42 inches!
- easy to open up. A bayonet ring is my favourite.
- really simple electronics but using a Lipo battery and a single brushless motor.
- preferably able to work as a dynamic diver to make it simple. (I have always been impressed by the late John Wrennall and his Graupner Shark.)
- there would be space for a small piston tank, if it was found to be necessary.
- it would be my first attempt to make a hull using a 3d printer. I only have a very simple Tronxy X1 printer which uses PLA filament but I have used it successfully for several years to produce smaller items such as deck fittings.
Research
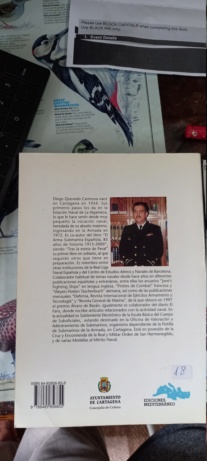
The first step was to obtain any books on the topic. I already knew that not much was available but fortunately the Museum bookshop had this useful book. (I had to brush up my Spanish!)

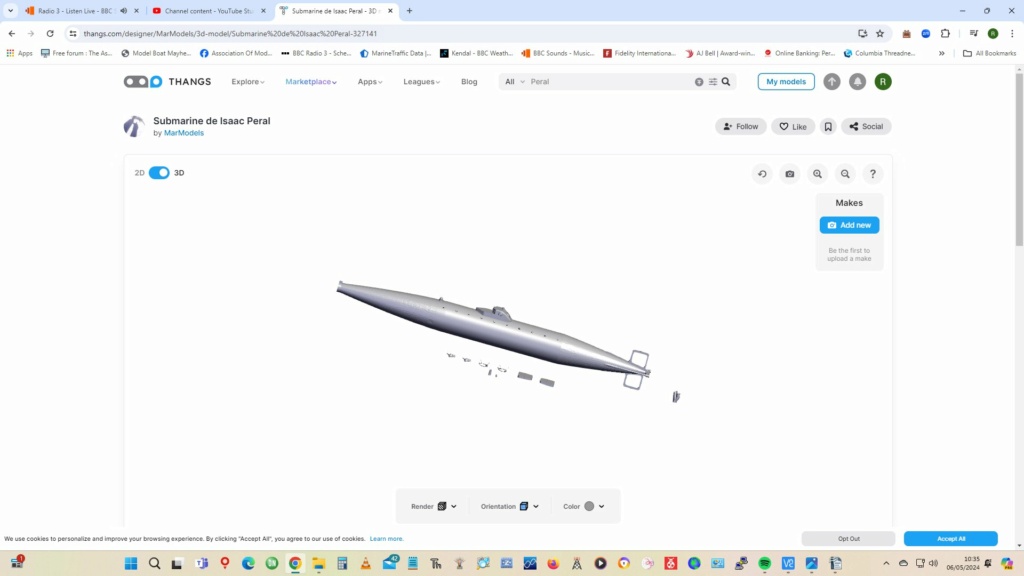
There is quite a lot online (including the very good Wikipedia article) also rather surprisingly this 3d design which was good for the overall design but not much use for the hull. (My small printer made it better to design and print hull sections and stick them together with Cyano.
Construction
The next couple of photos shows the heart of the model - the brushless motor, 3 to 1 reduction (approx) toothed belt drive and the (99-87mm ) Bayonet Lock Ring from Alexander Engel KG.
The aft bulkhead is made from polycarbonate and has an O ring seal against the inside surface of the bayonet ring. Shaft seals are the usual "Simrit" oil seals.

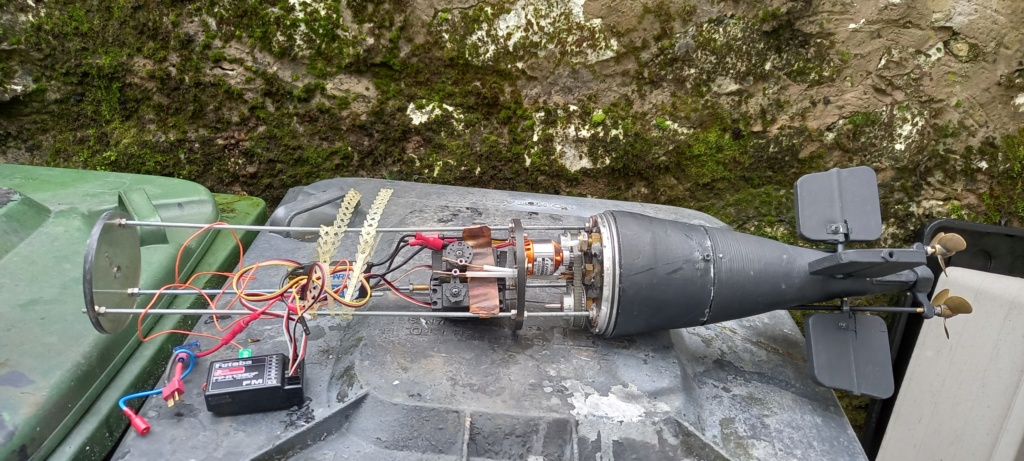
This was the first pond trial and it was really to test the mechanical aspects and make sure that water didn't get in (Oh and that the PVC and polycarbonate parts didn't un-glue! I have always found Devcon Plastic Welder to be very reliable.)
The cylindrical WTC is made from a piece of PVC tube (100mm OD used for extractor fans. The wall thickness is not as much as I would like - so no deep diving. The bayonet ring outer is stuck in the end with the help of another strip of the PVC tube to "pad it out".
The smaller diameter PVC tube, at the end, is to provide some space for the threaded rod of a piston tank (if needed.)
The rear cone was 3d printed and got cut into a lot so I then just printed another one. That is the beauty of 3d printing.

The next few photos show the 3d printed sections coming along. Note the Isopon Car Body Filler being used for the outside of the sections.
I was slightly disappointed to find that the PLA printed sectins didn't really have the strength required for a typically heavy model submarine. You will see that I applied internal fibreglass reinforcment to all the sections. (A single layer of glass cloth) This seems to be OK so far with no more splitting.
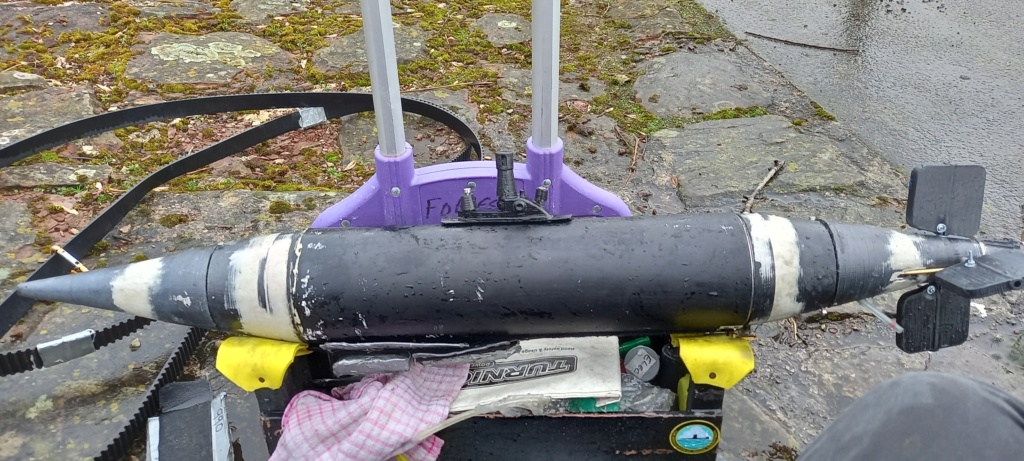
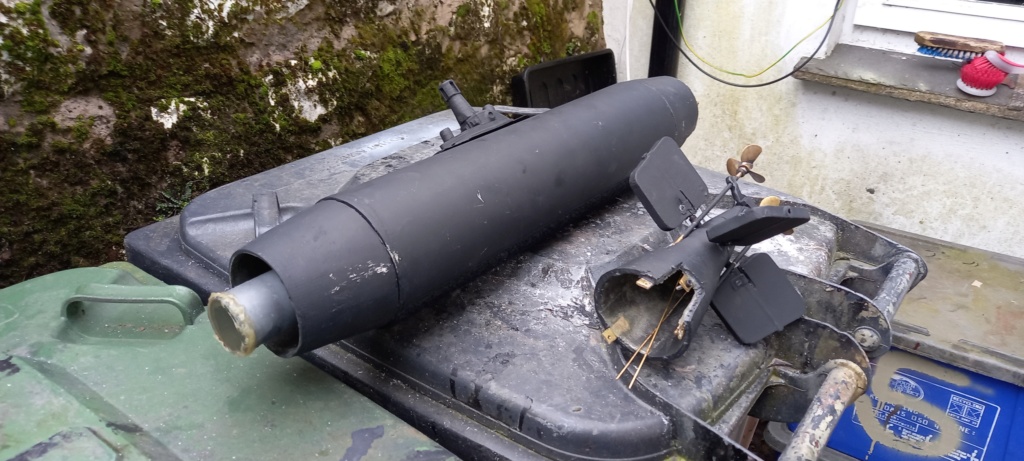

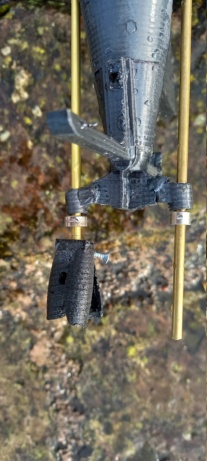
Suitable props create a dilemma. The full size sub has rather interesting (non-standard?) props which I have found very challenging to reproduce. These props shown are from the online 3d model and don't provide propulsion! At the moment i am using standard 4 blade marine props.
Further development trials at the Lake:
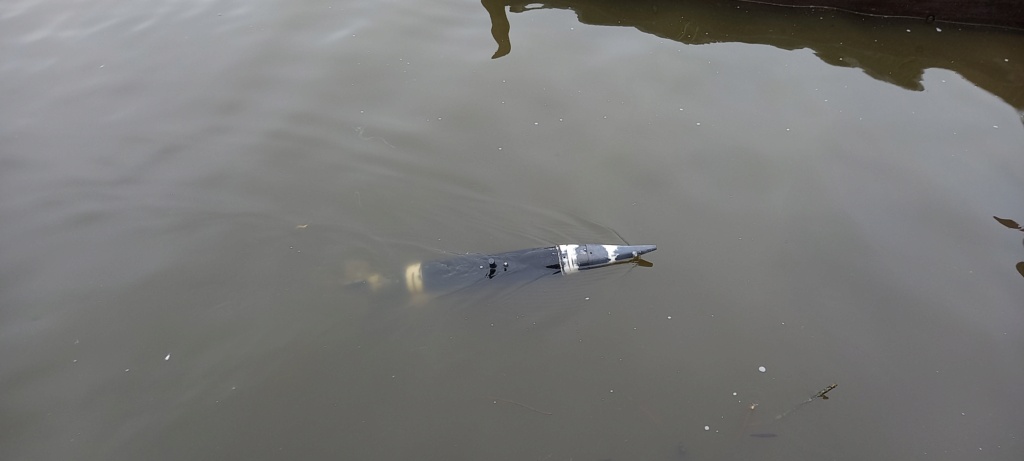


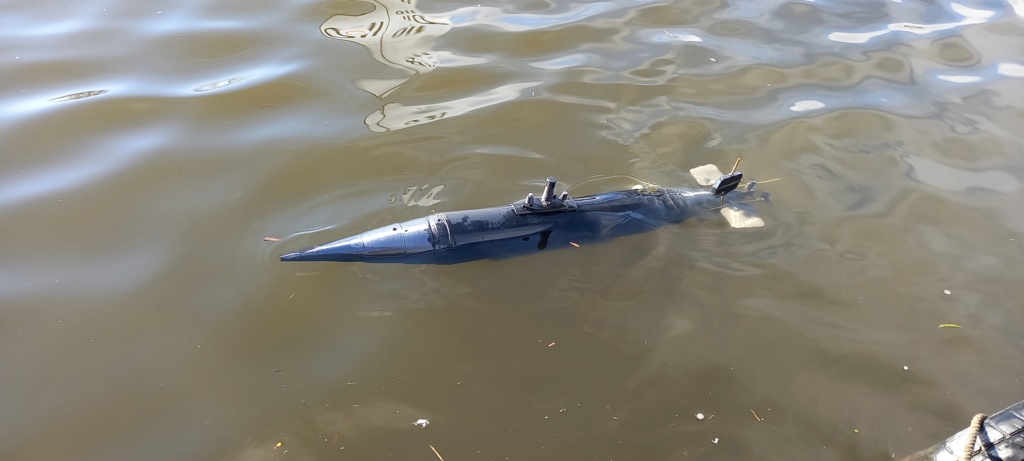
This video of the latest trials shows that she will work as a dynamic diver. This is very pleasing!
https://youtu.be/pN6VzT0g-GQ
Conclusions:
The latest addition to my fleet. (Taken at Papplewick this Easter.)
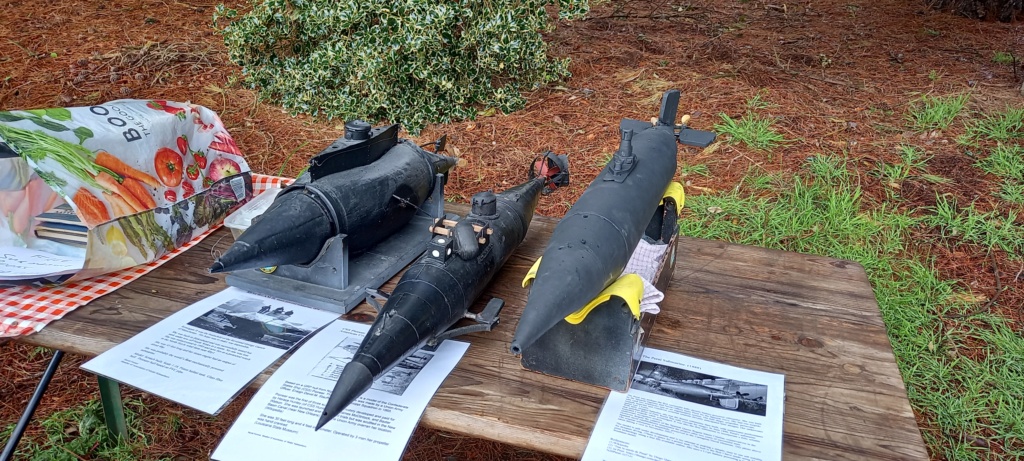
I am pleased with the model so far.
It is slightly disappointing that I had to do fibreglass reinforcement but it is my first 3d printed hull and it is only PLA. What was a big benefit was that you get the shape of the hull quickly and that it is so easy to print off another section.
It also saves a lot of time. This model took only about 6 months to get working. With my previous all fibreglass construction method it often took a year or more. (Including waiting for spring so that I could work with fibreglass outdoors! (The smell from polyester resin wins few friends.)
The next step is to add some more scale details without losing the dynamic diving ability.
References:
(1) Wikipedia
(2) "Tras la estela de Peral" by Diego Quevado Carmona. Publ. by Ediciones Mediterraneo, sl, 2001
(3) 3d Print: https://thangs.com/designer/MarModels/3d-model/Submarine%20de%20Isaac%20Peral-327141


Introduction.
The idea for this model started on a Mediterranean cruise we were on in November 2023.
Cartagena (the name is derived from Carthage - yes, its origins go back that far) is a handsome Spanish city which also happens to be a Naval base with an excellent Naval museum and this well preserved original submarine. The city and the Spanish people are still clearly and rightly proud of this sub. These photos were taken during my visit.
The Peral was perhaps the first successful fully electric battery-powered submarine. She was built by the Spanish engineer and Naval Officer Isaac Peral for the Spanish Navy. She had one torpedo tube (and two torpedoes) and an air regeneration system. Her hull shape, propeller, periscope, torpedo launcher and cruciform external controls cleverly anticipated later designs. Her underwater speed was 3 knots .
With fully charged batteries, she was the fastest submarine then built, with underwater performance that matched those of First World War subs (except for range). In June 1890, Peral's submarine launched a torpedo while submerged. It was also the first submarine to incorporate a fully reliable underwater navigation system.
However, despite the support of the Spanish Queen Regent Maria Cristina, conservatives in the Spanish naval establishment terminated the project after two years of successful tests.
I liked the look of the Peral submarine for the purposes of making a model:
- clean lines
- not much in the way of deck fittings to get knocked off.
- a cylindrical centre section which would be simple to reproduce and would have a useful internal volume.
- twin props were interesting and could give flexibility in use.
- hull sections with a lot of symmetry about them - easier to make using a 3d approach.
For the model itself, I had the following design principles:
- needs to fit on the back seat of a car. No longer than my magic figure of 42 inches!
- easy to open up. A bayonet ring is my favourite.
- really simple electronics but using a Lipo battery and a single brushless motor.
- preferably able to work as a dynamic diver to make it simple. (I have always been impressed by the late John Wrennall and his Graupner Shark.)
- there would be space for a small piston tank, if it was found to be necessary.
- it would be my first attempt to make a hull using a 3d printer. I only have a very simple Tronxy X1 printer which uses PLA filament but I have used it successfully for several years to produce smaller items such as deck fittings.
Research
The first step was to obtain any books on the topic. I already knew that not much was available but fortunately the Museum bookshop had this useful book. (I had to brush up my Spanish!)


There is quite a lot online (including the very good Wikipedia article) also rather surprisingly this 3d design which was good for the overall design but not much use for the hull. (My small printer made it better to design and print hull sections and stick them together with Cyano.

Construction
The next couple of photos shows the heart of the model - the brushless motor, 3 to 1 reduction (approx) toothed belt drive and the (99-87mm ) Bayonet Lock Ring from Alexander Engel KG.
The aft bulkhead is made from polycarbonate and has an O ring seal against the inside surface of the bayonet ring. Shaft seals are the usual "Simrit" oil seals.


This was the first pond trial and it was really to test the mechanical aspects and make sure that water didn't get in (Oh and that the PVC and polycarbonate parts didn't un-glue! I have always found Devcon Plastic Welder to be very reliable.)
The cylindrical WTC is made from a piece of PVC tube (100mm OD used for extractor fans. The wall thickness is not as much as I would like - so no deep diving. The bayonet ring outer is stuck in the end with the help of another strip of the PVC tube to "pad it out".
The smaller diameter PVC tube, at the end, is to provide some space for the threaded rod of a piston tank (if needed.)
The rear cone was 3d printed and got cut into a lot so I then just printed another one. That is the beauty of 3d printing.

The next few photos show the 3d printed sections coming along. Note the Isopon Car Body Filler being used for the outside of the sections.
I was slightly disappointed to find that the PLA printed sectins didn't really have the strength required for a typically heavy model submarine. You will see that I applied internal fibreglass reinforcment to all the sections. (A single layer of glass cloth) This seems to be OK so far with no more splitting.


Suitable props create a dilemma. The full size sub has rather interesting (non-standard?) props which I have found very challenging to reproduce. These props shown are from the online 3d model and don't provide propulsion! At the moment i am using standard 4 blade marine props.
Further development trials at the Lake:


This video of the latest trials shows that she will work as a dynamic diver. This is very pleasing!
https://youtu.be/pN6VzT0g-GQ
Conclusions:
The latest addition to my fleet. (Taken at Papplewick this Easter.)

I am pleased with the model so far.
It is slightly disappointing that I had to do fibreglass reinforcement but it is my first 3d printed hull and it is only PLA. What was a big benefit was that you get the shape of the hull quickly and that it is so easy to print off another section.
It also saves a lot of time. This model took only about 6 months to get working. With my previous all fibreglass construction method it often took a year or more. (Including waiting for spring so that I could work with fibreglass outdoors! (The smell from polyester resin wins few friends.)
The next step is to add some more scale details without losing the dynamic diving ability.
References:
(1) Wikipedia
(2) "Tras la estela de Peral" by Diego Quevado Carmona. Publ. by Ediciones Mediterraneo, sl, 2001
(3) 3d Print: https://thangs.com/designer/MarModels/3d-model/Submarine%20de%20Isaac%20Peral-327141



» RC Drift Gyro for pitch control
» WW2 mini sub build
» sonar data link
» Robbe Seawolf V2
» ExpressLRS - 868/915 Mhz equipment
» Flight controllers as sub levelers
» 868/915 Mhz as a viable frequency for submarines.
» Microgyro pitch controller corrosion